Monday, September 26, 2016

Samke Harra part2: Fish & Spiced Topping


2 tsp Ground Cumin
1 tsp Coriander Seeds
1 Tsp Cardamom Seeds
Pinch of Cayenne
½ Bunch parsley
2 Stalks Roasted Scallions
1 Lemon Zest
3 Clove Garlic
½ Cup Walnut Oil
Old Wife Fish (TriggerFish) ˣ

Let’s get started on part 2! Toast all of your spices in a pan on a medium to high heat. You have to constantly move them around in the pan so they don’t toast on just one side. Doing this helps to release the aromatics of the spices.Once they are finished take them out of the pan and let them cool down in a bowl or container.

Scallions, I love them so much. All of the recipes I have read on this dish had onions and to be honest if I could switch white or yellow onions with green ones, I will. Take the scallions and give them a rinse*, you want to make sure all of that dirt is gone. Season with salt and pepper, then drizzle with a bit of olive oil and put them in a pan and roast it for maybe ten minutes. Double check them after five, you don’t want them to burn to a crisp.


Now we are going to make the spiced topping.

Get your blender or food processor and add your parsley, scallions, oil, garlic, spices, lemon zest and a small amount of water if you are using a blender. The water will help get it going a little easier. A food processor is easier to do this with because it has a broader base.

While the topping is going, get your pan on a medium to high heat and lightly grease the pan with olive oil. Season your fish with salt and pepper in the meantime. The topping should be done; it doesn’t have to be smooth.

Place the fish in the pan, skin side down and turn the fire down to medium heat. If you can, lightly press on the fish with your fingers to prevent it from curling,  if not please use a small spatula. Don’t press the fish like you would a burger, it’s a delicate animal and should be treated  gently. It will spend most of its time on that side, this will guarantee a crispy skin. Once the flesh starts to look opaque flip it over briefly for a few seconds then take it off.    

Plate up your dish with whatever design you want. Be creative, have some fun. Make it look nice. Have a great dinner and go impress some friends.


ˣ If you can’t get trigger fish, then any white fish will do.
*Always wash your herbs as soon as you get them.


Sunday, September 25, 2016

Samke Harra Part 1: Fish Sauce


3 lbs. Fish Bones
1 Orange
2 Tomatoes
5 Stalks Celery
1 Onion
½ Bunch Thyme
2 Bay Leaf
5 Cloves Garlic
5 L Water
¼ Cup Tahini
1 Scotch Bonnet Pepper

What’s up everyone? I am sorry I have been gone for so long. I’m back and ready to hit you with recipes for the fall.

I have spent some time reading and looking around the internet for inspiration. I came across a dish called Samke Harra. I have never cooked this dish before in my life so I did some extensive reading before I even attempted it. To be honest I wish I had one of my friends around to give me a nod of approval, nonetheless I loved it and decided it was worth posting.  This is a two-part recipe, there is the fish sauce and then there is the fish itself.

The recipe has a very basic fish stock.  Usually when people make a sauce they take all the vegetables and bones out. While I was in New York the Chef at A Voce made lobster stock and blended everything in there and then put it through a strainer. I did something similar but I took the big bones out because I know fish doesn’t blend like lobster.

You are going to peel your onions and add them into the pot. Quarter your Oranges and Tomatoes, roughly chop your Celery. Add all other ingredients into the pot then pour in the water. Bring it to a boil then turn it down to a simmer. I let mine reduce by 1/2. Once it’s done, take the bones and oranges out. Try to keep all the veggies in there. Grab your blender, put all of the veggies and leftover fish inside. Now like all of my recipes only pour in enough of the stock to barely cover the vegetables. Puree until it’s smooth. Once finished, put it through a strainer so that it’s really smooth. If you don’t think the flavor is strong enough you can reduce it. Taste and see if it needs salt.


Grab your Tahini and measure a ¼ cup and add it slowly to the fish sauce. You may not need all of the Tahini. There should be a nice balance of both flavors in the sauce.


Keep it warm or let it cool down and reserve in a container it if you aren’t going to use it now.

Whats next ? Tomorrow I will have part 2 ready for you.

Monday, July 18, 2016

Bitter Tangerine Sauce, An experiment that worked out


Hey everyone sorry I have been MIA (Missing in Action). It’s not that I haven’t been cooking but, not every dish that gets done I think deserves a post. I did however post a picture on Instagram of the Conch dish, which was one of the many experiments over the last two and half maybe three weeks (It’s been too long).

So today we have a successful experiment. Wasn’t a smooth path to walk on but I figured it out. Back in A Voce we would make this orange bitter sauce. We sliced the oranges into disk shapes and boiled them in a sugar solution, blended them and added oil. To be honest it wasn’t bad, but I found it a little too bitter for my liking. I wanted to recreate it, but I didn’t want to use oranges, and I also wanted to control how bitter it was going to be and how sweet it was going to be.

Bitter Tangerine Sauce

6-10 tangerines
1 ¼ tsp Angostura bitters
4 tsp Gelatin Powder
1 Cup water
1/2 Cup Sugar
Canola oil

Shall we start?  I peeled all of my tangerines, measured everything I needed, took a few pictures then started. Now I will type this as a recipe then go on my little rant about my total fail and quick recovery after.

Peel your tangerines and place them in your pot with your sugar solution. Use the smallest pot you can find. You don’t want a pot that’s too big or else it will reduce too fast. Leave it on a medium heat and let it simmer for 20 minutes. Once the time is up, strain them and keep the liquid. Add the tangerines into the blender, cover and start to blend on a low speed, slowly making your way up. As its blending, slowly add maybe 4 tablespoons of oil . Then add maybe a few tablespoons of the liquid left over from the tangerines in the pot to it. If it doesn’t thicken with the oil, then pour it back into the small pot and reduce by a third. If it’s still not thick enough you can either reduce it a little more or do what I did and that was add gelatin
Now I did this by  pouring my hot liquid and measuring it. It was almost 1 cup full. Then I put it back on the stove.

You can thicken a sauce using 1 – 4 tsp of gelatin powder to one cup of liquid. I used some of the leftover solution and added the gelatin to bloom*. The liquid has to be cold or else it won’t work. Once its bloomed you can add ½ first and if it’s not coating the back of a spoon enough for you then add more of the gelatin to the puree. Just let it simmer until the gelatin is all dissolved. Finish with the bitters. Pour in a bowl to cool down. Once its cooled down pour it into a bottle for later use.

You can store it in the fridge and it will solidify. But once you have it at room temperature or a little warmer it will loosen up. I know this sounds a bit complicated and there are other ways to do this, especially with agar agar but I didn’t have any in the house (Come to think of it, I probably should).

Once I realized that my puree wasn’t thickening with the sauce I got worried. Now using gelatin to thicken a sauce was not something I had ever done and had to run to the computer and do a quick read up. I read a few pages and discussions and had an “okay” understanding of what I was supposed to do. To be honest I didn’t have any more tangerines and didn’t want mess this up so I needed to get this right. Anyways, it was success and I felt the need to share this with you.
This blog post is only one part of a dish. So keep your eyes peeled for part two in a couple of days.

* To bloom gelatin means you add it to a liquid to help breakdown its structure and activate it. Its very similar to what you do with yeast. If it's sheets then blooming will cause it to get soft. When you do the powder then it gets like jello.

Monday, June 6, 2016

Quinoa? Hot summer days come with light dishes


Summer is finally here and it is HOT.

I hope everyone out there is still cooking up a storm, enjoying the warm temperatures, the cold drinks and the great food. I am almost pretty sure that you have your grills going every weekend.  

If you want to take a break from a grill, Let me give you a dish that’s light and healthy ,try this dish out for the weekend.

This dish is based off a previous last minute dinner I had done for me and my girlfriend. She absolutely loved the quinoa and what was in it. My only problem was I couldn’t recreate it the next day because I had used up all of my Brussel sprouts. The following day I remembered that I had a pound and a half of broccoli in my fridge, so I used that. Quinoa is very diverse and can be eaten cold or warm. I love it among the many other alternative grain with rice - I think Orzo is number one for me.

Anyways, enough chitter chatter, let’s get to cooking this dish!

Braise & Sauce
¼ rutabaga
3 Scallions
1 head garlic
1 branch rosemary
Bunch of spinach
10 to 15 chicken thighs
¼ tsp. fennel seeds
Seasoning salt
6 Cups Brown chicken stock/white
Salt
Black pepper

Quinoa
1 cucumber
3 heads broccoli
1 apple
¼ tsp Cumin
Basil
1 cup Quinoa


Please turn your oven on to 400 degrees.

Measure your Quinoa and give it a good rinse. Leave it to drain in a fine mesh strainer until you are ready for it. Cut your broccoli florets into really small pieces so they look little tiny green trees and save them in a bowl. Small dice your cucumber (try and keep those cuts the same size, practice makes perfect) and keep them separate for now. Peel and small dice your apple (be sure to keep it in lemon water or else it will oxidize and get brown).
Season your chicken with salt (seasoning salt instead if you have it), and black pepper. You want to give the chicken a good sear. So place them in a pan skin side down. As they are cooking get a braising dish or Pyrex big enough for the braise. Place them in the dish once they are all done. Peel & cut your rutabaga, scallions, add them with the chicken. 

Get a small pot, pour 4 Cups of stock, add your rosemary, garlic and fennel seeds. Bring it up to a boil (this will help cut down the cooking time in the oven). Pour in the braising dish, add a little bit more salt, place a lid and put it in the oven for one hour.
Back to the quinoa! Add 1 tbsp. of olive oil in a medium size pot, once it’s warm, add your quinoa, give it a light toast. Season with salt and pepper and add the remainder of your stock into it. Bring the Quinoa to a boil then turn it down to a simmer and partially cover it. Be sure to check it every 5 to 8 minutes just to make sure it hasn’t stuck to the pot.

Just before the Quinoa is finished (it takes at least) give the broccoli a quick Sautee. Be sure not to let the broccoli brown. Check your Quinoa, it should have a slight crunch, use your front teeth to bite it. Once its finished, add everything into a bowl; add the quinoa, apples, broccoli, cucumbers and ground cumin. Now, before I served it I thinly sliced some basil leaves (it’s called chiffonade). You can do the same, not every basil plant is the same so keep tasting and adding if you have to, until the flavor and smell of the basil is subtle.
Back to the chicken! It should be just falling off the bone, just. At the end of the day it  should be soft and that’s all that matters. Take them out of the dish and keep in a separate container. If you can, also separate the liquids & solids in the baking dish. Add the solids into your blender and pour enough liquid to barely cover the solids. As you blend it, add some oil, season it.I added spinach at the last minute, it wasn’t part of the plan but I figured it was going to be a good idea.
I tend to have moments like that, where I do things last minute because it feels like a good idea. 

Grab a hand full and add it to the puree. It should be nice and green. Almost like the hulk (who is by far my favorite superhero of all time). Taste it, adjust to your taste with seasoning and that’s your very green sauce to go with your yummy chicken and your healthy Quinoa!

Thursday, May 5, 2016

An influence from all over: Carrot Ginger Sauce, Crispy Chicken & Lime Relish


Hey everyone, I hope all is well in your culinary world. A few months ago an Aunt of mine asked me to do a dinner for her. It hasn’t happened yet but I’m hoping it will be on the menu. It isn't very often that I use my Caribbean roots as an influence for a dish, I feel that I have alot more to learn, but every once in a while I experiment with a dish I am creating. This started out as a Carrot, Chicken & ginger soup and while I was flaking the chicken for inside the soup, I decided to do a new dish as well. I saved some of the flaked chicken and once I had pureed the soup I also saved about a cup for the new dish I was thinking about.

1 Mandarin
2 Limes segmented
¼ scotch Bonnet (Fine Dice)
1 Tbsp. Olive Oil
Celery leaves
Thyme leaves
Dill leaves
½ Cup Flaked Chicken
1/8 tsp Fennel Seeds
1/8 tsp Smoked Paprika
½ Cup Carrot ginger sauce (here)
Salt
Pepper
Bay leaf powder

The following day I got everything together. My sauce( the soup), chicken and all of the ingredients to do the salsa.


A few days ago I was in indigo café and saw a book that I have been meaning to get for over a year. As I stood up turning pages and looking at pictures and recipes from the cookbook NOPI, I stopped and there was a dish that looked great and sounded awesome. It was the baby squid with almond tarator & Lime relish. Every dish created by a chef is inspired by an experience, an old recipe. That’s what makes everyone’s dish their own. I took a picture quickly for reference as my girlfriend was checking out and I was about to be left behind in Indigo. Now I always look at NOPI’s recipe’s whenever I can. They do great food and the book has great pictures. As I stood in the kitchen the day before while I was pureeing the soup dish, I said why not do my own lime relish. It was decided, that’s what was going on the chicken.


Put your sauce/soup on a low heat, you don’t want it to burn on the bottom or get too brown, so a nice low heat to bring it up to temperature. Make sure you stir the sauce every couple of minutes to prevent burning.
I skinned and diced my limes and mandarins; in the kitchen we call it segmenting. I then got my scotch bonnet pepper, finely minced that, added my oil, salt and picked leaves. I gave it all a good mix, and adjusted the seasoning. 


The relish reminded me of home, and that’s because It tasted like gooseberries. Some people call them raspberries but I don’t think they are similar in genus. If you’re ever in the Caribbean go and give them a try. They have a flavor combination that’s like a crunchy tart celery leaf, it’s a bit weird to be honest, but so good! 


Next was the flaked chicken which I put in a hot pan with oil, paprika, fennel seed and ground bay leaf. I left them in there to crispy up and get a golden brown colour. I lightly seasoned it with salt & pepper and stored it in a small dish when I was done. Now we have everything, the Relish, chicken and sauce. When plating, add a spoonful in the center of the dish and lift it up and with the palm of your hand lightly bang the underside of the plate upwards. This will encourage the sauce to spread evenly. Place your chicken in the middle of the sauce and put the relish on top. There you have it, an awesome dish that tastes like the Caribbean. 


Wednesday, April 20, 2016

Turkish Baharat Lamb

Hey everyone, I’m sorry I haven’t posted anything in the past three weeks, it’s been a busy month, and then last week my internet said “today I will not work” and went on strike for three days.

Today I want to talk about those cheap cuts you don’t want to buy. Give me one good reason you don’t want to use them? There is so much hidden gold in “rib” cuts and “stew” cuts. Generally, the cheap cuts are the ones that need braising for three or four hours. Time + Love + Cheap cut = Tender yumminess in your mouth. Don’t forget that!

Braising meat can take time and I understand that. I was always told that as simple as something like a braise is, it’s easy to mess up. I honestly feel it’s the truth, I’ve tasted a few braises that were just bland and didn’t have flavor. So pay attention to how you are braising your meat - you have to check on it, make sure it hasn’t overcooked, have patience, know when it’s perfect. All of these are things you have to repeat in your head when you’re doing a braise.

2-3 lbs. Lamb for Stew
Salt
2 Sprigs Rosemary
5 Cloves Roasted Garlic
Fresh Coriander
Fresh Oregano
Salt

Turkish Baharat Spice Mix
1 tbsp. Ground Black Pepper      
1 tbsp. Ground Cumin
½ tbsp. Ground Coriander
½ tbsp. Mint Leaves
½ tbsp. Ground Clove
½ tsp Ground Nutmeg
1/8 tsp. Ground Cardamom
1/8 tsp. Ground Cinnamon
½ tsp. Ground Bay leaf
1/8 tsp. Ground All spice

I had two pounds of lamb that were cut into small pieces. I didn’t want to put them in the oven, they weren’t big enough nor did I have enough meat to do a proper braise. So I cheated and pressure cooked my meat instead. I marinated the meat a day before with the Baharat Spice mix. After marinating for 24 hours I put my pressure cooker on a high heat, poured some oil inside, so I could get a good sear on the lamb.

Once It was finished searing I added some salt, Rosemary, Roasted Garlic then just enough water to cover the meat. Then I put the lid on so it could start to pressure cook. Do not remove the lid or release the pressure. You want it to cook for 30 minutes.

Now, when thirty minutes is up, make sure your sink is clear. You are going to put the pot in the sink (with the lid still on) under your pipe and turn the cold water on to let it run over the pot. This cools the pot and helps to equalize the pressure on the inside with that of the outside. Usually there Is a knob or button that indicates when there is pressure. Once it falls and shows there is not more pressure, just wait another minute. It’s better to be safe than sorry as pressure cookers can be very dangerous.

Now you’ve got really tender lamb without having it in the oven for four hours. Separate the liquid from the lamb into a pot and leave to reduce on a medium heat. Reserve the lamb and keep warm, maybe at a very low temperature in the oven (150°F).
Once your sauce is reduced, taste it, season it. You don’t need to strain your sauce. I strained mine so it could look perfect for the pictures (unless you’re running a restaurant or doing a blog post, I wouldn’t get too worried). Keep the sauce warm on the stove.

If you love Couscous and Mediterranean grains, then cook up your favorite and serve it with this lovely spiced Lamb dish.

I thinly sliced some radishes and kumquats. Pick some coriander leaves and oregano leaves for plating garnish. There were some baby carrots that I sliced and gave a quick saute. In the end, what I plated was for pictures and a bit more of plating practice.

Try this for fun, taking special care when plating is visually appealing to whomever will be eating your dish.

Have a great week everyone, keep cooking. Food is life!


Monday, March 28, 2016

Braised Beef fun


What’s up everyone? It’s supposed to be spring but due to Mother Nature not complying with that notice, it still feels and looks like winter. So until those spring days’ start rolling in, I don’t see why we shouldn’t have a few last minute winter dishes.

The Result - Braised beef with a Bean medley. Earlier this week I got me some big beef ribs in the supermarket. You know those days when you want a nice, warm yummy soft beef rib? No? Yes? Maybe? Okay, well today was definitely one of those days. Please soak your beans the night before so they don’t take too long on the stove.


2 lbs Beef Ribs
½ lb Onions
½ lb carrots
¼ lb celery
2 Tomato’s
1 Head of garlic(peeled)
1 ½ tbsp Smoked Paprika (toasted)
½ tbsp. Cayenne pepper (toasted)
½ tbsp. Cumin (toasted)
½ cup Brandy/ Port
4 Bay Leaves
Water
1 Cup Beans Medley
½ Cup Apple Cider


First thing I did when I woke up was get my ribs defrosting because I wanted to start everything by 2 in the afternoon for dinner. When I had seared the beef and took a picture (for the blog of course) I decided to show it off to my family and friends so I could have their mouths watering. Mission was definitely accomplished. My little sister couldn’t figure out why I was cooking ribs for so long. I had to give a quick explanation to her then she finally understood. She’s a real foodie and grieves over all the pictures I send her.


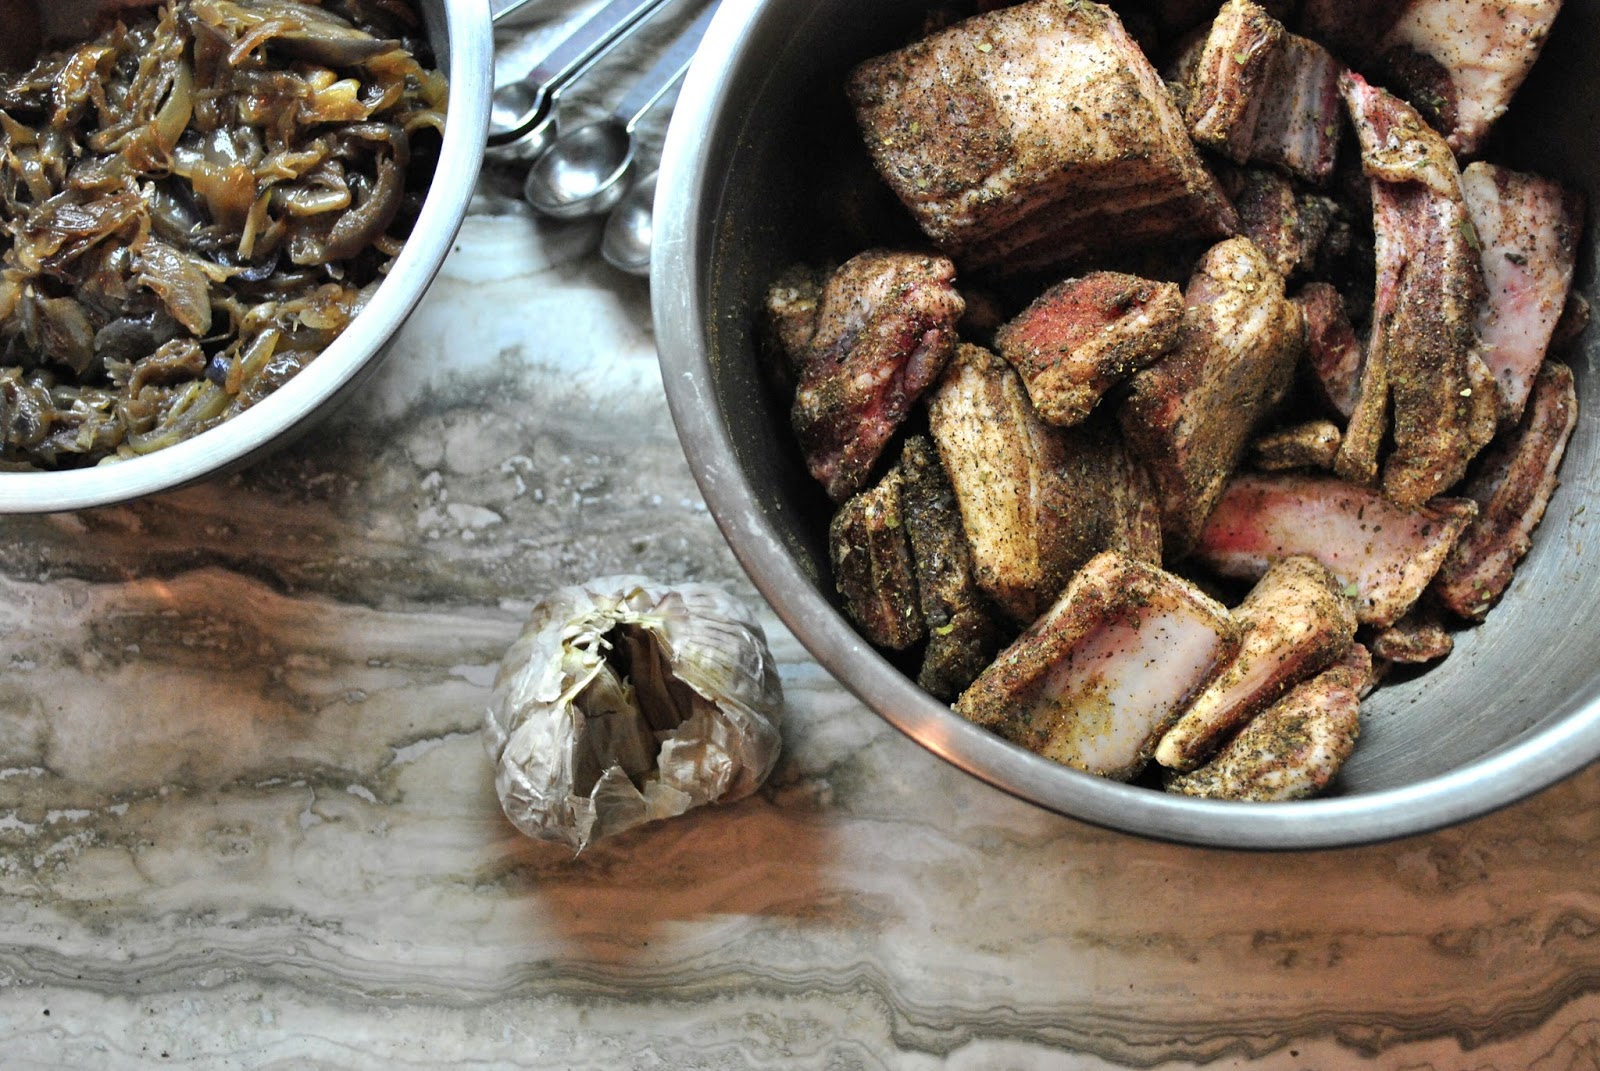
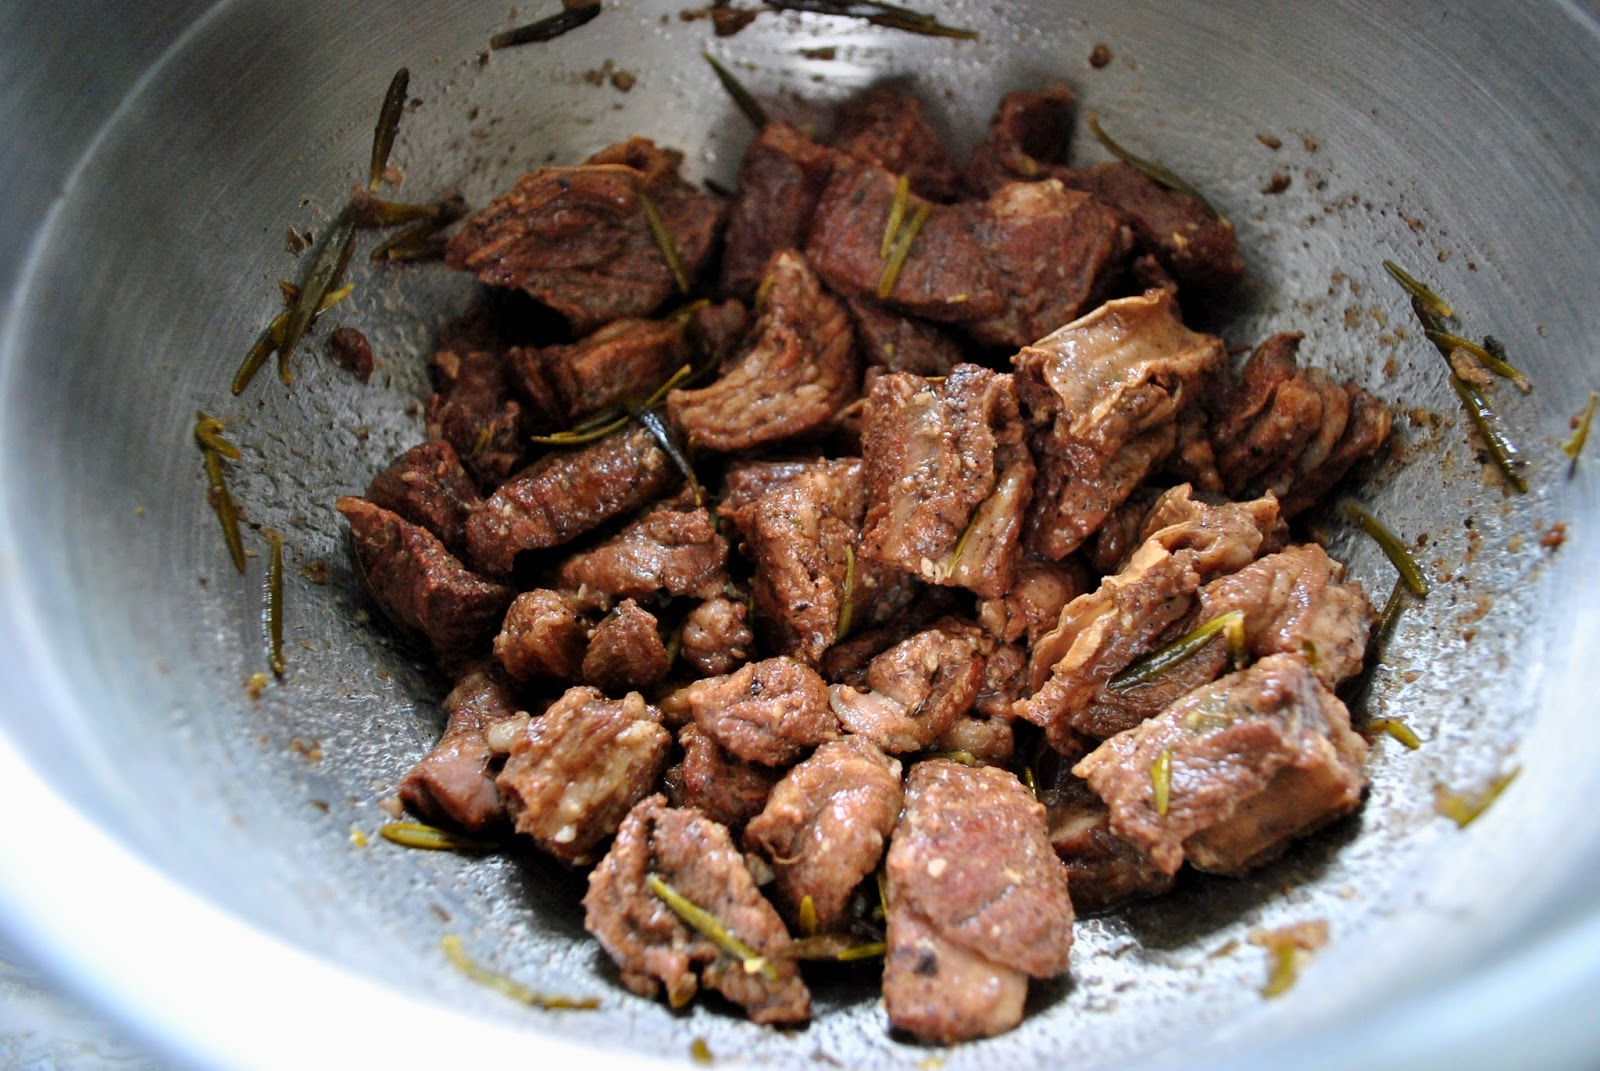
By two in the afternoon it was time to prep, season, and braise. I got the ribs and cut them into pieces. They came in two slabs, I had a total of eight ribs. I seasoned these bad boys heavily with salt and pepper, got a big pot and poured some oil at the bottom so I could start searing the ribs. Don’t use a high fire please, you will smoke out your kitchen, set off the fire alarm and if you don’t turn it off, the fire department will probably pass by your house. A medium heat is good and put two maybe three ribs in the pot and leave them to get brown. We want an even coat of caramelization on the meat. Once they are all done, put them in your roasting pan. Drain off your oil and give your pot a quick clean if you think it’s too burnt on the bottom.

If the bottom is brown, then that’s fine. That will contribute to flavor, but be very careful. If it’s got a lot of black bits and a blackish bottom, don’t use it. Just clean it, and get some new oil in there. Never compromise!

Before you go putting your pot on the fire, cut your veggies up, your carrots, onions and celery. Once they are ready, get your pot on a medium flame again, add oil then your carrots. Carrots have a higher sugar level than onions, and take longer to cook. That’s why we add them first. Once they are caramelized, add your onions. Once they have gotten nice and brown add your celery & tomato. They have the highest water content of the three so they go in last. Add a bit of salt & pepper then your spices. We are mixing all those flavors together for 5 minutes. When they are done, pour it in your roasting pan with the meat. Grab your brandy and pour it straight in to deglaze the pot, scrape the bottom. We want all that goodness at the bottom. After three to five minutes, you shouldn’t get any harsh alcoholic fumes. That’s when you pour it in the roasting pan. Then fill your roasting pan with water an inch higher than your ingredients. Put it in your oven for three hours and 15 minutes at 350 degrees.

Drain your beans, put them in a pot with new water, add some bay leaf, and a little salt and pepper. Leave them to simmer on a medium heat for 1 hour. Check your beans, they shouldn’t be too soft. They need to have a little bite to them.

Once they were done I strained them and finished mine with a little dried citrus, apple cider vinegar, a little oil, salt and pepper.

Three hours are done, your house smells like awesomeness and your life is about to be a lot happier. Now, when you check your ribs they need to be soft and almost falling off the bone. That’s a good braise, when it’s almost falling off the bone. We are going to take the ribs out and store them in a container with some of the braising liquid. This is to keep the meat moist. We will separate the remaining liquid from the veggies so we can make the sauce. In a blender, add the veggies then fill it halfway with the liquid. Puree until smooth and season if necessary. There you have it, simple, good hearty food. A thick flavorful sauce, beans that have a nice sharpness to it, and a very tender beef rib.

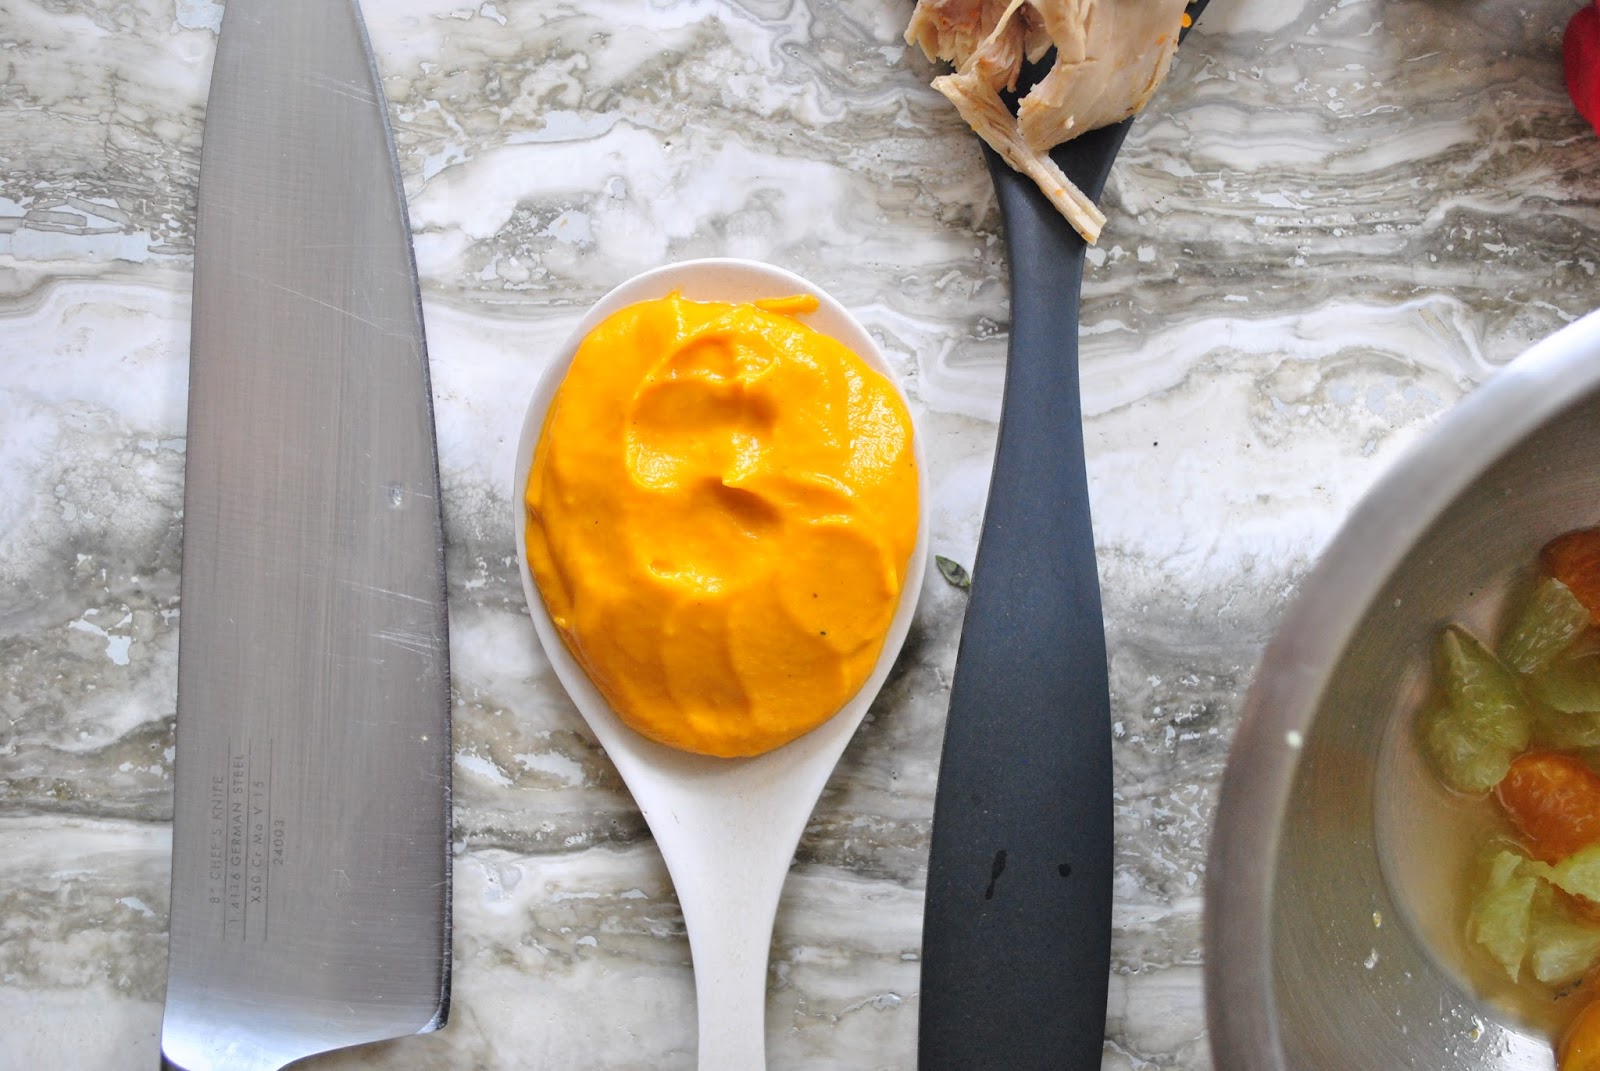
Plating alternative: Olive Tapenade, Spiced egg, Braised beef, Burnt Onion Dust


Monday, March 21, 2016

Mediterranean Monday: Muhammara


Hey everyone! Another day another recipe. Two years ago I came to Toronto and ate in a well known branch of restaurants called O&B. It was there I was introduced to Muhammara. I had it with a chicken dish. Muhammara is a spicy pepper sauce. Classically it has Aleppo pepper. As I didn't have access to Aleppo, I used Red bell pepper, Cayenne & chili pepper mix, and Smoked Paprika. It's my.first time making this Mediterranean sauce, I liked the way it turned out and can't wait to use it this weekend.

Let's get to cooking!

1 Roasted Redbell pepper
1 Head Roasted Garlic
1 1/4 tsp. Cayenne pepper
1/2 tsp Smoked paprika
1/4 Cup Chopped Walnuts
1/2 Lemon juice
1tbsp. Toasted Ground cumin
1/2 cup olive oil
2 Slices of a multigrain bread*

Okay so first thing is to cut the head off the garlic and drizzle with oil, wrap it in foil & roast it @ 200°F for two hours. Once that is done get your pepper, drizzle with oil and roast in a pan @ 400°F for one hour twenty minutes ( be sure to turn it every thirty minutes for an even roasting). I have a small toaster oven so I did them both separately. If you can't do that then this may take a while. I did it as soon as I woke up.

It's one of those things that you can just do, set a timer, sip your coffee and not think about it until your house starts to smell like yumminess.

Once everything is done, you can put your peppers in a bowl, wrap in cling film & steam them for five to ten minutes. In the mean time you can peel the roasted garlic. It took me a little longer than usual to peel them because I wanted minimum wastage. Measure your ingredients out and keep them in little containers. (I find measuring ahead of time is better than measuring as you follow the recipe).

Don't forget your peppers! Give them a peel, take out the seeds and just put it straight in the food processor with the garlic and oil. It will be a little thick so add a tablespoon of water. You just need this to get it going. Once it's a puree, add the other ingredients into the processor, the lemon, the peppers, salt, cumin. Taste it, check the seasoning. Always remember to put less if your not sure and check it, then add more.

Like the tapenade it's not a super smooth puree. This sauce is a bit more diverse when it comes to complimenting meat or fish, try it with a lamb, or a pulpo(octopus). Muhammara is best when served warm as a sauce. It can also be used as a spread for a sandwich. So get to cooking and make this yummy Mediterranean sauce.

*The Muhammara usually has breadcrumbs in it, but I don't want to eat too much bread so I left it out.

Monday, March 7, 2016

Roasted Garlic & Olive Tapenade


Sunday Funday! I’m sorry I have been so quiet in the past two weeks everyone. I’ve been busy. I did however get to spend a weekend in Elora, Ontario. A very quiet little town with a very unique touch to it. They had this really small bakery with some amazing bread. You know it must have been good, because when we got there, it was just after twelve and all of the bread was pretty much gone. Come to think of it, that bread would have been perfect for this tapenade.

So this tapenade reminded me of being back at Sheer Rocks in Antigua. Mine is a little different from theirs but arguably just as good. Olive tapenade is an olive spread from the Mediterranean. It can be salty, but that can easily be controlled. I didn’t add any salt to mine. A few other things to remember is that adding an acid, like lemon, will intensify the salt in anything.

1 Cup Olives, pitted

1 Head Roasted Garlic

1 Tbsp.  Toasted Walnuts

¼ tsp. Smoked Paprika

1 Lemon Segment

4 Sprigs Chopped Parsley

Black Pepper


You’re going to roast your garlic head. You can either wrap it in foil and bake it at 200°F for 2 hours or slowly confit* them in a pot of oil for 1 hour on a really low heat.


Taste your olives before you start, if they are too salty give them a quick boil to help extract some of that salt. Next we will toast the Walnuts in a pan for 5 minutes, constantly moving them around so they will toast evenly. When they are done, put them in a container to cool down.


Now, your roasted garlic, olives and walnuts are ready for the next step. Add them in a food processor with a little bit of oil (use can use the oil from the garlic) and just give it a quick blitz. The mix will never be smooth, which isn’t a problem. Once it’s done pour the mixture into a bowl. We are going to add our paprika, black pepper & chopped Parsley into the mix, stir it all in. Add the lemon juice last and add it little by little, If you put too much you can't take it out. Taste it and adjust your seasoning.


There you have it, you’re one step closer to gaining more knowledge about Mediterranean Cuisine. This spread is awesome with some croutons, or a fish. Experiment, read and learn as much as you can! Food is life! Keep cooking! Until next time everyone, have a great day. 

*To confit means to cook something in its own fat. The term is loosely used now for anything being cooked in a fat.

Wednesday, February 24, 2016

Goat Cheese Balls: Not your regular Cheese Ball


Good evening everyone! Tonight I have a nice little treat for those goat cheese lovers. Earlier this week I posted about a Burnt Onion Dust and honestly I loved it. We are going to use that and the Beetroot powder from last week’s post, along with the blood orange Relish for our goat cheese balls. I’ve seen post’s where people call them goat cheese truffles, unless it’s a real truffle or truffle chocolate, I won’t call them that. These make a great snack and like all of my recipes or discussions so far, a great dish for a first impression. It doesn’t take a lot of time. Once you already have these powders, dusts, and relish made then it shouldn’t take more than 10 or 15 minutes to put together. I guess if you have a lot of people over or doing a large quantity it will take more time. Anyways! Let’s jump to it. 

You’re going to need the following: -

1 Log goat cheese
1/3 Cup Dried Cranberries
1/3 Cup Cashews (get extra for you to snack on)
Burnt Onion Dust
Beet powder
Dukkha*
1 bunch Oregano
Blood Orange & Papaya Relish
Black pepper

These are all things that I had already made in the kitchen and thought they would all be really good with the cheese. Besides the Dukkha, I have a recipe for all of those powders.

First thing is we are going to take the relish out of the fridge so that its room temperature. Take your cashews & give them a rough chop and put them in a pan on a medium heat. We are going to give them a toast on the stove. We just want to get the nuts a little brown, do not burn them, and constantly move them around. Once they are finished you can take them out and put them in something to cool down. Now we will give the Cranberries a rough chop also. We have our nuts and cranberries all done and in containers. Take the goat cheese and put it in a mixing bowl.

We then want to add our cranberries and cashews. I used half of what I had then checked to see if I wanted more. At the end of the day, if you want more just add it. Crack a small amount of Black pepper into the mix. Now with your spatula or wooden spoon, just work the mix for a bit. Get everything into the goat cheese. Put the mix in the fridge for the time being.


Pick your oregano leaves. Only use the small green leaves. We want everything to be elegant. There’s nothing worse than serving a nice snack with an ugly big green leaf that will be over powering in flavor. You want just a hint of the oregano when you bite into the balls.


Once we have everything together, take out the goat cheese and scoop a little over a tablespoon and roll it into a ball using your hands. Now just add your relish on your plate or board. Then place your goat cheese on top, we are then going to add a "dust" of your choice on top. Finish with your oregano and serve.

A nice elegant snack that you can use to impress loved ones, your partner or friends. At the end of the day you have changed your game by serving typical goat cheese in a different form and with different accompaniments.

*Dukkha is a Mediterranean spice & nut rub that has sesame seeds, coriander, cumin, dried mint leaves, Pistachio, Hazelnuts, cashews. There are many recipes online, and you don’t have to follow any single one to be exact. Don’t buy it in a supermarket. Try and make your own mix.
Please ask any questions or leave comments. Keep wanting to learn and try new things, don’t forget. Food is life!